Manual Injector

To perform injections of recycled plastic using solar thermal energy, Plastok developed a portable manual injector in Geneva in 2020. This machine is part of a system dedicated to plastic recycling without requiring electricity. . Based the work done by plastok, this machine was designed during the 2021 Solar Plastic Recycling sessions with Liquen Eyewear, Recua_and volks.eco. Ideal for portable injections and worldwide DIY.
The Components
Must of the components required are standard :
-
3 x Wooden bar 60x80x190mm (1)
-
1 x Support plane 20x300x200mm (2)
-
1 x Minimum 88mm car jack (3)
-
2 x 90° connector 1/2" (4)
-
2 x 90° bend 1/2’’ (5)
-
1 x T connector 1/2" (6)
-
2 x 90° wall fixture 1/2’’ (7)
-
1 x Injection plunger (8)
-
4 x Wood screw 1" (9)
-
4 x Wood screw 2" (10)
-
8 x Wood screw 3" (11)
-
4 x Tube-DIN EN 10253-2- 1/2’’x200mm (12)
-
2 x Tube 1/2’’ 80mm (13)

This manual provides a step-by-step guide on how to construct a portable manual plastic injection machine. With a detailed breakdown of the components and tools required, you can easily assemble the injector for plastic injection processes.
Tools Needed
-
Miter saw
-
Tape measure
-
Screwdriver
-
Star-tip driver
-
4mm diameter drill bit
-
10mm diameter drill bit
Creating the Manual Injector
STEP 1: CUTTING THE WOOD
Start by cutting the wooden components to the required dimensions using a miter saw and the 2D plan [S005-PLA-202212131.pdf].
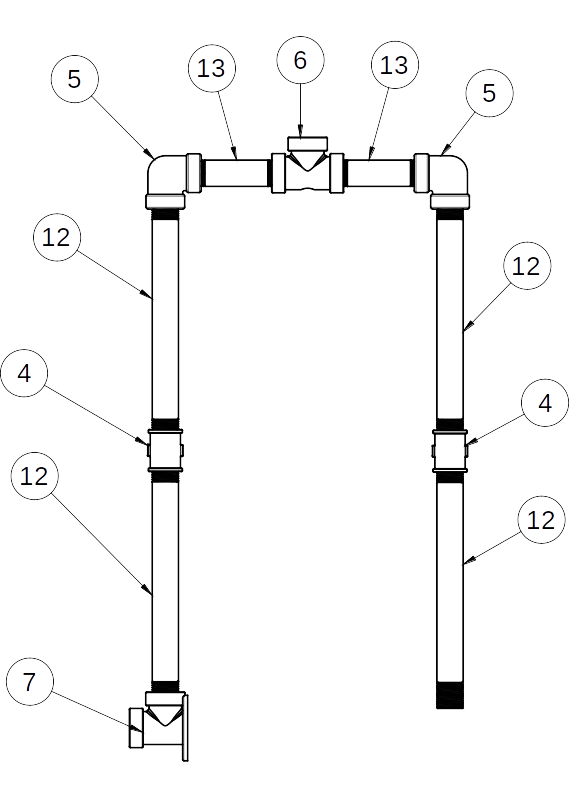
STEP 2: PREPARING THE METAL PARTS AND ASSEMBLE THE FIRST PIPES
Ensure the metal parts are cleaned and prepped for assembly.
The Components
-
2 x 90° connector 1/2" (4)
-
2 x 90° bend 1/2’’ (5)
-
1 x T connector 1/2" (6)
-
1 x 90° wall fixture 1/2’’ (7)
-
4 x Tube-DIN EN 10253-2- 1/2’’x200mm (12)
-
2 x Tube 1/2’’ 80mm (13)
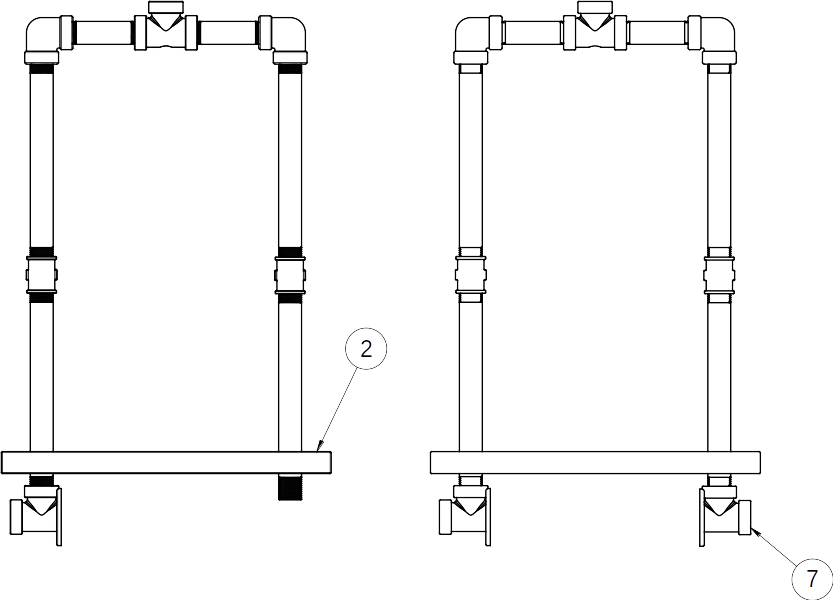
STEP 3 : ASSEMBLE THE BASE PLANK
Attach the wooden support plane to the assembled metal structure using the T connector 1/2" (6).
The Components
-
1 x Support plane 20x300x200mm (2)
-
1 x 90° wall fixture 1/2’’ (7)
STEP 4: ASSEMBLE ALL THE FIRST
Fix the first wooden bar with the right screws.
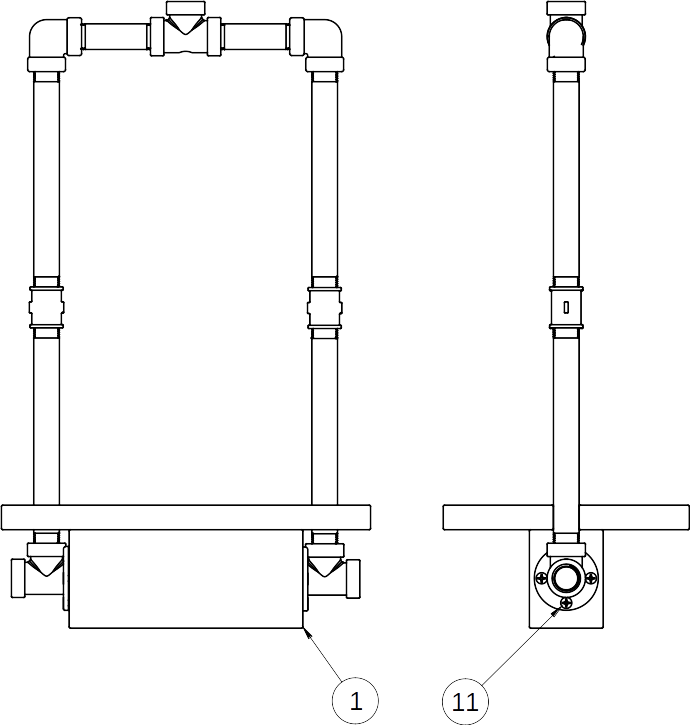
The Components
-
1 x Wooden bar 60x80x190mm (1)
-
6 x Wood screw 3" (11)
STEP 5: ASSEMBLE ALL THE WOOD
Secure the wooden beams and the support plane to create the base of the manual injector, using the right screws.
The Components
-
2x Wooden bar 60x80x190mm (1)
-
6 x Wood screw 3" (11)
-
4 x Wood screw 2" (10)

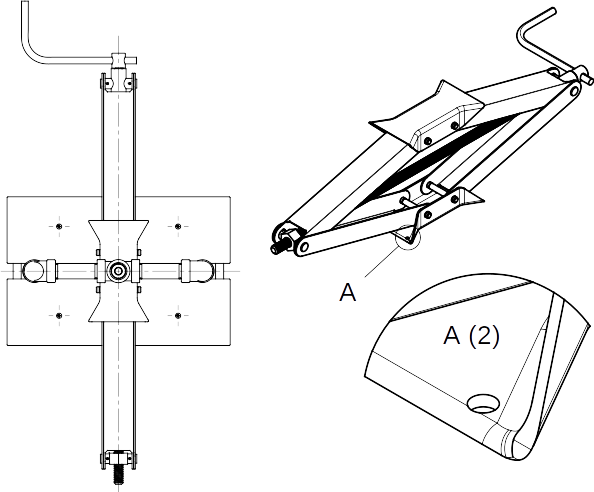
STEP 6: ASSEMBLE THE CAR JACK
Integrate the car jack into the wooden structure for the raising and lowering mechanism, using the right screws.
The Components
-
1 x Minimum 88mm car jack (3)
-
4 x Wood screw 1" (9)
To fix the car jack (3), four holes are needed to align the car jack lifting axis with the wooden plank base and the pipe structure :
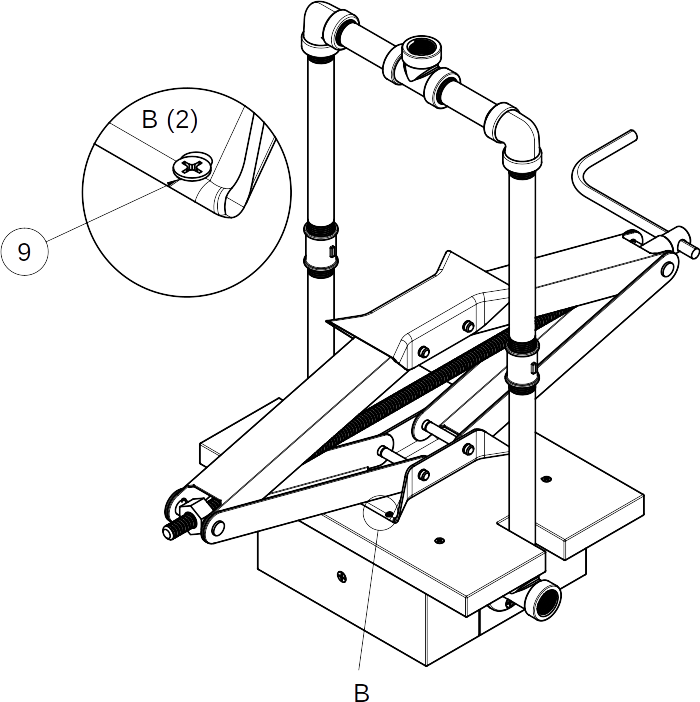
STEP 6: ASSEMBLE THE PISTON
The Components
-
Injection plunger (8)
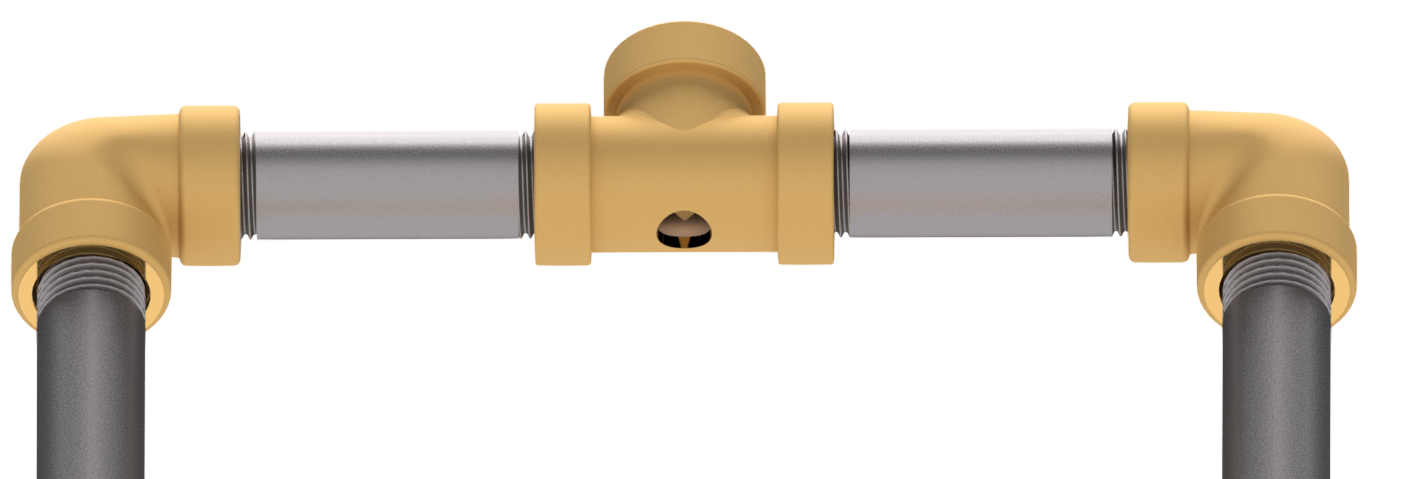
To assemble the Injection plunger (8), a drilled hole needs to be made in the metal. The diameter of the hole should match the diameter of the Injection plunger (8), which in our case is 10mm. The hole can be adjusted to 10.5mm, for example.
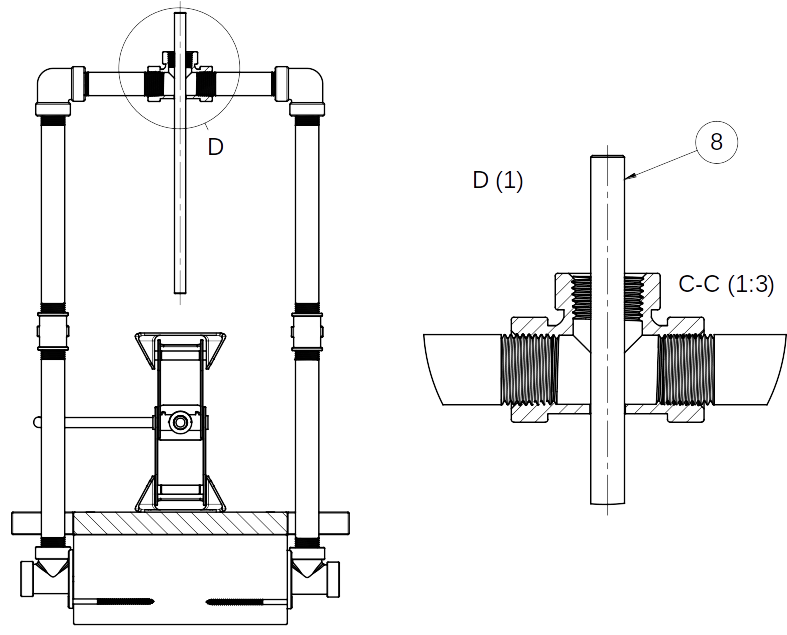
Using the Manual Injector
PREPARE THE MANUAL INJECTOR
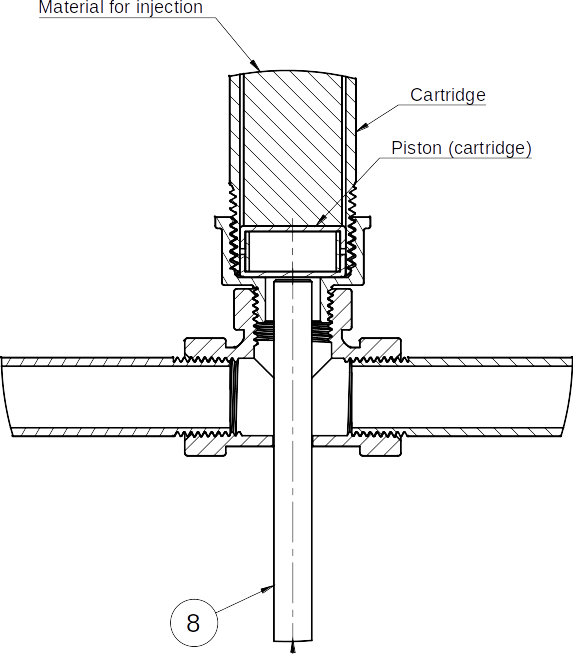
Ensure that the manual injector is properly set up and stabilized before usage. Check that all components are securely fastened and aligned for smooth operation. And must important the carjack needs to bring the injection plonger(8) to the right position for the cartridge assembling. The end of the piston plunger(8) needs to be just in the entry of the cartridge connection(1/2")
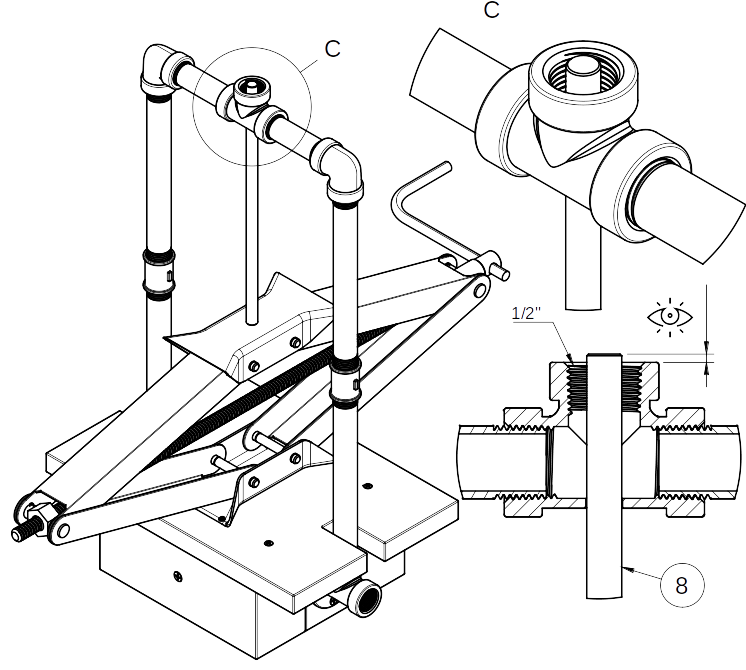
ASSEMBLE THE CARTRIDGE
Connect the manual injector with the cartridge, which is ready for injection, ensuring that the 1/2" reducer is positioned off the piston side. Ensure the piston plunger(8) is already in the right position insde the the 1/2" reducer of the cartridge.
PUSH THE INJECTION PLUNGER
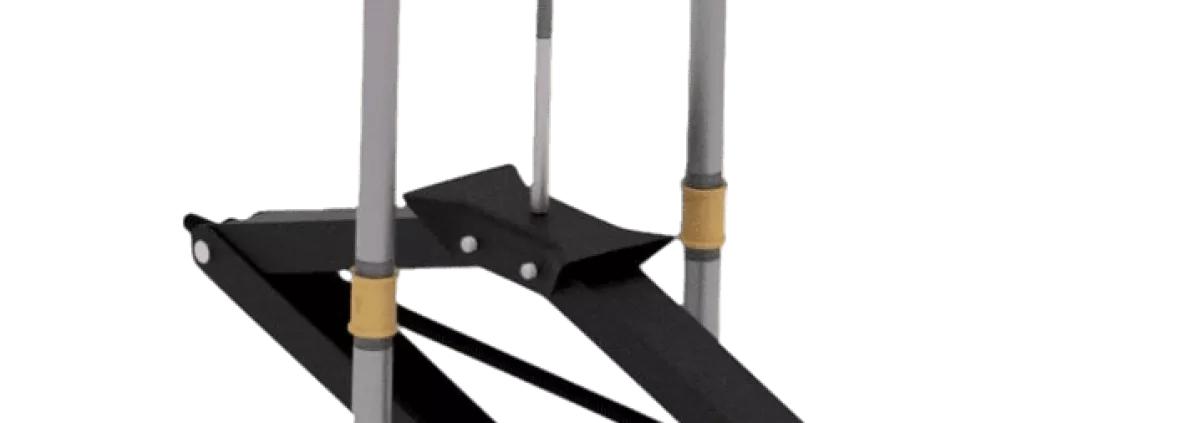
Utilize the car jack (3) to push the Injection plunger (8) manually, rotating the manual crank with one hand and gripping the entire setup with the other. Engage the car jack to perform the injection, and pay close attention to monitor the process with accuracy and effectiveness. Please note that the cartridge may exceed 180°C and cause burns; therefore, use appropriate gloves for safety.

TAKE OFF THE CARTRIDGE
After the injection, detach the cartridge from the manual injector while it is still hot, as it is easier to remove at this stage. Handle the cartridge with caution, considering its elevated temperature and the potentially hot plastic contents.
Please log in or sign up to comment.